
One more for tonight guys... evidently the Two Guys Garage guys are popular. The SPEED channel is running another marathon of this season's episodes. Just like when they did this a few weeks ago, the first three episodes of this season include us installing our standard 3-Cell Kit in the Factory Five Racing '33 Hot Rod. Taping this was a lot of fun and the simplicity of the wiring of the car is really easy to see. The marathon is this Sunday, December 19th, starting at 11:00 AM Central.
Here is the schedule:
EPISODE #901 - Factory Five Build Part 1
EPISODE #902 - Factory Five Build Part 2
EPISODE #903 - Factory Five Build Part 3
EPISODE #904 - Welding Tips
EPISODE #905 - Custom Camaro
EPISODE #906 -SuperNova
EPISODE #907 - See It Made-Magnaflow
EPISODE #908 - Fead System
EPISODE #909 - 2011 Mustang
EPISODE #910 - Café Racer Gets Jets
EPISODE #911- Turbo Tech
EPISODE #912 - Operation Comfort
Watch us in the first 3 episodes: 901, 902 and 903.
Please check your local listings for the exact date and time. SPEED may change any air dates or times due to live events, which preempt taped programming. Viewers should always check local cable guides for any possible last minute changes made by the network.
Wednesday, December 15, 2010
inTOUCH MAX Install Example...
Hey Guys,
We've been slacking in our blogging duties. I have been on the road a lot over the past few weeks going to shows and calling on customers. My rock-star travel schedule includes exotic places like Detroit, MI, Louisville, KY, Chippewa Falls, WI and Nacogdoches, TX.
Anyway... We finally got some pictures from Kevin McMillan to show off his ISIS inTOUCH MAX install. You may remember that Kevin did his first ISIS install when he wired the car for Marlan Davis for Hot Rod Magazine. For his latest project, he mounted this touch screen in a 1957 Chevy that he is building for a customer.
Check these out...


The car just came back from the trim shop and Kevin is beaming over how well it turned out. I'm blown away. He is going to send more pictures, but I wanted to get these out to you.
The top picture really shows the benefits of the touch screen off. There are absolutely no switches on the dash. The entire car is controlled through the touch screen on the console. In addition to the simplified wiring that comes from using ISIS in your car, the dash is absolutely clutter free.
I'll post more as I get them in from Kevin.
Jay
We've been slacking in our blogging duties. I have been on the road a lot over the past few weeks going to shows and calling on customers. My rock-star travel schedule includes exotic places like Detroit, MI, Louisville, KY, Chippewa Falls, WI and Nacogdoches, TX.
Anyway... We finally got some pictures from Kevin McMillan to show off his ISIS inTOUCH MAX install. You may remember that Kevin did his first ISIS install when he wired the car for Marlan Davis for Hot Rod Magazine. For his latest project, he mounted this touch screen in a 1957 Chevy that he is building for a customer.
Check these out...
The car just came back from the trim shop and Kevin is beaming over how well it turned out. I'm blown away. He is going to send more pictures, but I wanted to get these out to you.
The top picture really shows the benefits of the touch screen off. There are absolutely no switches on the dash. The entire car is controlled through the touch screen on the console. In addition to the simplified wiring that comes from using ISIS in your car, the dash is absolutely clutter free.
I'll post more as I get them in from Kevin.
Jay
Wednesday, December 1, 2010
Check out the International Performance Classics' Evil Eleanore

We have been working with Stephen Farmer at his team at International Performance Classics in New Zealand for some time now. They recently finished an install of our ISIS 3-Cell Kit in their new Evil Eleanore Mustang. They got some great coverage of the car in NZV8 Magazine. They called this car "NZ's Best Mustang" and we're proud to be a part of it.
This car is a well done resto-mod with all of the modern bells and whistles. It is a complete '67 Eleanore made entirely from new parts including wiring the car completely with our 3-Cell Kit with inLINK. They are using out inMOTION Motor Controller for the power windows and the electric locks. They have done some trick things with custom programming including using the switch panel from a Mini Cooper to control all of the lights. Check out the pictures in the article. Everything fits the look perfectly.
You can read the article and check out more pictures by clicking here. You can also read more from NZV8 at their website.
Friday, November 26, 2010
Watch ISIS Power on Two Guys Garage...
Hello to all,
We hope that you all had a great Thanksgiving. Most of us are out of this office this week catching up with our families for the holiday. We'll be back in the office ready to go on Monday.
In the meantime, we got an email from the folks at Brenton Productions, the SPEED Channel and Two Guys Garage. The SPEED Channel is running a Two Guys Garage marathon on Saturday December 4th starting at 2:00 PM Eastern. Check with your local cable provider for details.
The first three episodes in the marathon are the ones that we shot with the Factory Five Racing team when we helped them wire their '33 Hot Rod. Tune in to watch us all build the car in 4 days.
Mike and I spent a week on the set with the Factory Five Guys, Dart Engines, Monster Transmissions and of course Bryan Fuller and Kevin Byrd. We install a 3-Cell Kit with inLINK in the Hot Rod, replacing the traditional car wiring that you get with the kit. You can see where we mount the MASTERCELL and POWERCELLs plus see the simplified wiring in the car.
Here are the details for the whole marathon. Check it out.
EPISODE #901 - Factory Five Build Part 1 SATURDAY - 12/4/10 @ 2:00 PM EST
EPISODE #902 - Factory Five Build Part 2 SATURDAY - 12/4/10 @ 2:30 PM EST
EPISODE #903 - Factory Five Build Part 3 SATURDAY - 12/4/10 @ 3:00 PM EST
EPISODE #904 - Welding Tips SATURDAY - 12/4/10 @ 3:30 PM EST
EPISODE #905 - Custom Camaro SATURDAY - 12/4/10 @ 4:00 PM EST
EPISODE #906 -SuperNova SATURDAY - 12/4/10 @ 4:30 PM EST
EPISODE #907 - See It Made-Magnaflow SATURDAY - 12/4/10 @ 5:00 PM EST
EPISODE #908 - Fead System SATURDAY - 12/4/10 @ 5:30 PM EST
EPISODE #909 - 2011 Mustang SATURDAY - 12/4/10 @ 6:00 PM EST
EPISODE #910 - Café Racer Gets Jets SATURDAY - 12/4/10 @ 6:30 PM EST
EPISODE #911- Turbo Tech SATURDAY - 12/4/10 @ 7:00 PM EST
EPISODE #912 - Operation Comfort SATURDAY - 12/4/10 @ 7:30 PM EST
Friday, November 19, 2010
Wiring the Ford ECU for the New Coyote 5.0L Crate Motor...
We have had a few customers ask how to interface the engine management system for Ford's new Coyote 5.0 engine. If you haven't seen this yet, check it out. It is an awesome package. The new five liter engine, throttle-by-wire, complete and turnkey. Tons of power.
Wiring the ECU with an ISIS 3-Cell Kit is a breeze. Ford did a great job designing this wiring harness and made everything simple. There are only a few wires off of their FRPDB (Ford Racing Power Distribution Box) that you need to connect to the POWERCELL outputs.
Blunt Lead 1 (Red/Light Green wire) gets connected to POWERCELL 1 Output 3 (Light Green wire) which is the ignition signal.
Blunt Lead 2 (Dark Green) gets connected directly to the fuel pump positive. If desired a relay could be used to switch this from a positive signal to a ground signal and then connect it directly to a MASTERCELL input and then just connect the fuel pump to the rear POWERCELL. If you wanted to do some modifications inside of the Power Distribution Box, you could probably rewire this to a ground signal output. Give us a call if you want more info.
Blunt Lead 3 (Red/Light Blue wire) gets connected to POWERCELL 1 Output 4 (Light Blue wire) which is the starter signal.
Blunt Lead 4 (Dark Blue/Orange wire) goes to the clutch interlock or neutral switch depending on the type of transmission.
Blunt Lead 5 is the tach signal
Otherwise connect the main feed to the Power Distribution Box to the battery and connect the grounds as noted. That is it for the connections between ISIS and the engine harness.
Contact one of our technical service guys with more questions on how to wire this, or any other ECU into your car with the ISIS Intelligent Multiplex System.
http://www.isispower.com/
Saturday, November 13, 2010
Pictures from the Global Media Awards Reception...

Okay Folks,
The good folks at SEMA are trickling out pictures and press releases from the 2010 show.
Here is a shot of the team receiving a Global Media Award for our new ISIS inTOUCH Mobile system.

Pictured from left to right: Duane Reh, Mike Weber, some SEMA official and Jay Harris.
Jay
Friday, November 12, 2010
I can be okay with Runner Up...
Our company is built on innovation. We know that sitting idle with technology is a recipe for disaster. I am honored to have a group of tremendous talented and creative folks over here at ISIS Power.
From our first debut of the ISIS Intelligent Multiplex System in 2008 at SEMA, we have been recognized as innovators. We won Best New Product in Mobile Electronics at the 2008 SEMA show for our original inTOUCH product plus 5 Global Media Awards.
As I have emailed and blogged about recently, the 2010 SEMA show was a chance for us to highlight our engineering and development efforts. New products like inMOTION, inRESERVE, inTOUCH MAX and inTOUCH Mobile are great examples of the technology that we can bring to restorations, hot-rods, muscle cars, Pro-Touring, racing, kit cars and 4-wheel. Our goal is to make car wiring easier plus get our customers more control over their electrical accessories.
This link will take you to the announcement from SEMA for the products recognized at this year's show as the best of the best. They had a record number for entrants, more than 2,000. (I was wrong in my previous blog post and emails. I thought that it was only 1,500.) I am very proud of our team to be recognized as runner-up in that broad field as the Best New Engineered Product for our inTOUCH MAX system.
Tuesday, November 9, 2010
Custom Classics Mustang...

They just finished an awesome 1967 Mustang for a customer. This car has a full ISIS Intelligent Multiplex System install powering everything. You can see more pictures of the car and get details at this link.
The car has one of our 3-Cell Kits with inLINK installed in it. The MASTERCELL is above the pedals. One POWERCELL is in the trunk and the other is behind the left-front fender. It is a pretty basic installation and you can't see a single wire in the car.
Outside of our 3-Cell Kit, the car has:
- 4.6 3 valve mod motor with Kenny Bell super-charger
- TKO Tremec 5-speed transmission
- Built Ford 9" rear-end with Heidts 4-Link rear suspension
- Fuel Safe fuel cell
- Ron Davis twin fan Aluminum radiator
- Kenwood Navigation head unit and JL Audio amps and speakers with help from Premium Sound Security
- Paint is Standox base coat clear from Metro Paint Supply
- Body kit by Mustangs to Fear
Saturday, November 6, 2010
SEMA 2010 Coming to a Close...
Greetings to all,
The 2010 SEMA show has finally come to an end after 4 days of meeting people, demonstrating our new products, standing and talking. All in all, I call it a success for us. We came in as runner up in the Best New Engineered Product category for our inTOUCH MAX product, won a Global Media Award for our inTOUCH Mobile, met tons of new prospective customers and caught up with tons of our existing customers.
Lots of people contributed to our success at this year's show. I want to first thank all of the people that came by the booth to learn about the ISIS Intelligent Multiplex System for the first time. They had a hands-on opportunity to learn how we can help them wire their cars easier.
I also want to thank all of our existing customers who came by the booth to cheer us on, ask questions and introduce themselves to let us put a face to the name. We spend a lot of time on the phone with our customers and we love to meet them in person.
I also want to thank all of the customers at home who have been patient with us while we have been on the road this week. We do our best to keep up with emails and voice messages while we are away, but I know that I am way behind.
Finally, I want to thank our ISIS team. Everyone went out of their way to make sure that his show was a success specifically Mike, Duane, Anna, Chris and his entire team at I Squared Engineering. Honorary members of our team now include Kevin Hines from Special Editions and the entire Mischik family.
I am sitting in the hotel with a lousy Internet connection and no USB cable so I can't download the pictures and videos off of my camera. I'll do that when I get home tomorrow.
Thanks again!
Jay
Thursday, November 4, 2010
Another award for ISIS at SEMA 2010...
Well... we were awarded another Global Media Award this year for our new ISIS inTOUCH Mobile product.
The Global Media Awards are given by a team of international magazine editors who select a limited number of new products that they feel would be of interest to their readers. Sixteen different countries were represented by this year's panel of judges.
Our inTOUCH Mobile product was selected by Juan Carlos Cuellar, editor of Sobre Ruedas, a Honduran automotive enthusiast magazine.
Thanks to Juan Carlos and all of the other judges on the panel. This is another great win for the ISIS Power team.
Wednesday, November 3, 2010
Update from SEMA 2010...
Greetings to all from the 2010 SEMA show in Las Vegas,
We're set up and have made it through day 1. The booth looks great. Our two customer cars really stand out and are a great draw. Here is a quick video of it from the end of the day yesterday when we finished setting it up.
We had 4 entries in the New Products Showcase. Two of them were launched earlier this year: inMOTION and inRESERVE. We're thrilled to announce two new and very unique interfaces to the ISIS Intelligent Multiplex System.
The first is our new inTOUCH MAX System. This is a double DIN sized touch screen that becomes a complete interface to the system. Check out the sell sheet here.
The second is inTOUCH Mobile for Apple Devices. This is our new Wi-Fi interface with an Apple app that allows you to control your ISIS system in your car through an iPod Touch, iPhone or iPad. Check out the sell sheet here.
While we were hoping for the coveted title of Best New Product of the Year for one of our submissions, we placed as runner up in the Best Engineered New Product category for inTOUCH MAX. Yes, we are a little disappointed. However, considering that there were 1,500 new products submitted, we still think that we did okay.
We've shot some videos of both inTOUCH MAX and inTOUCH Mobile products in action and will get them out tomorrow for you to see. Stay tuned for more ISIS Power updates from SEMA.
Tuesday, October 19, 2010
Vegas, Here we come...
Okay Folks,
We've been slacking on our blog posts. Things have been busy, as you can imagine. Outside of our normal daily operations, we are scrambling to get ready for the 2010 SEMA show in Las Vegas, November 2nd through the 5th. For those who don't know about it, this is the aftermarket industry event. SEMA is a very important event for us. We actually won Best New Product of the Year in the Mobile Electronics category at SEMA 2008.
There are dozens of little details that need to get squared away to make this work. All 890 pounds of the booth materials, demos, kiosks and tools were loaded up on a skid and trucked away last Friday. The rest of the pieces will go out this week. The electrical is set up, carpeting, flights and hotel rooms.
If you are going to be out there, stop by booth 28300 and check things out. We will have two tremendous customer cars on display demonstrating the ISIS Intelligent Multiplex System. Additionally, we will have hands-on demonstration kiosks to let you push buttons to try things out.
The first car comes to us from Special Editions. Their Beck Spyder is a beautiful car, elegant and simple. It is wired with our 3-Cell Kit using our rear-engine configuration. Plus it has a few special tricks that you will have to check out when you get to the booth.
I have sung the praises of our second car several times in this blog. Joe Mischik and his son Trevor built a tremendous tribute to the 1967 Ferrari 330 P4. This is a long, lean thoroughbred that draws a crowd from miles. Again, it was wired with our 3-Cell Kit.
With both cars, we want to show our customers the benefits of wiring with ISIS. These are both very simple cars, without tons of electrical functions. Even though they are simple, the wiring was a very easy job with ISIS plus they got added functions that you couldn't get with a traditional wiring harness. Once you see how easy the install is in basic cars like these, you can imagine how ISIS will work for you with a more complicated build.
We are debuting 4 new products at the show for 2010. Two were launched earlier in the year: inRESERVE and inMOTION. There are two more that we are keeping as a surprise until the New Products Awards Breakfast on November 2nd. All I have to say is that these will completely change the way that you interact with your car and there is no one else out there that can do this the way that ISIS can.
Keep watching the blog. I'll leak a little more out as we get closer to the show.
See you in Vegas in a few weeks.
Jay
Tuesday, October 12, 2010
How to wire a 3-Wire Alternator
Okay Guys,
Someone just asked a question about how you connect a three wire alternator into a car and interface it with ISIS. This is very simple and straight forward. The following diagram shows you how to do this.

Simply, terminal 2 gets jumpered to the battery stud. The battery stud gets connected to the positive terminal on the battery. It is important to size the gauge of wire connecting the alternator to the battery to the full rated current of the alternator.
Terminal 1 gets its reference voltage off of the ignition output on the POWERCELL. You just splice into output number 3 which connects to your ignition system. Between terminal 1 and the POWERCELL, you splice in an incandescent light bulb which acts as the charge indicator. This light will go out when the alternator is generating current correctly and will light if there are any issues.
You can download this app note here. There are many other similar notes in our Reference Library that will help you wire your car with the ISIS Intelligent Multiplex System.
If you are looking for information on wiring a 1-wire alternator, there is a good video on YouTube that will show you how to do this. Check it out here.
Someone just asked a question about how you connect a three wire alternator into a car and interface it with ISIS. This is very simple and straight forward. The following diagram shows you how to do this.
Simply, terminal 2 gets jumpered to the battery stud. The battery stud gets connected to the positive terminal on the battery. It is important to size the gauge of wire connecting the alternator to the battery to the full rated current of the alternator.
Terminal 1 gets its reference voltage off of the ignition output on the POWERCELL. You just splice into output number 3 which connects to your ignition system. Between terminal 1 and the POWERCELL, you splice in an incandescent light bulb which acts as the charge indicator. This light will go out when the alternator is generating current correctly and will light if there are any issues.
You can download this app note here. There are many other similar notes in our Reference Library that will help you wire your car with the ISIS Intelligent Multiplex System.
If you are looking for information on wiring a 1-wire alternator, there is a good video on YouTube that will show you how to do this. Check it out here.
Monday, October 4, 2010
Turn-Signal Options...
As a follow up to the post yesterday about turn-signals, there are two more options in our standard front-engine configuration: Mechanical Multi-Filament and Mechanical Single-Filament. This is where there is sometimes some confusion. In both cases, this is where you use a traditional steering column with the canceling mechanism built in. This can be an OEM column or one from an aftermarket company like IDIDIT or Flaming River. In both cases, the mechanism in the column turns off the turn-signal action when the steering wheel returns to the center position.
The mechanical column, multi-filament configuration should be used when you have separate filaments in the rear of the car for the turn-signals and the brake lights. These could be completely separate bulbs or different filaments in a multi-filament bulb. The inputs to the MASTERCELL control separate outputs for left & right turn-signals plus the brake light. In the standard front-engine configuration, these inputs are 29, 30, 31 and 32. There is a good rule of thumb for multi-filament turn-signals: if your turn-signals are amber, you should probably be using the multi-filament configuration.
The mechanical column, single-filament configuration should be used when the brake lights share a common filament with the turn-signals in the back of the car. Remember that you need to look at the filaments, not the bulbs. In this case, the MASTERCELL inputs will activate the left and right turn-signals as directionals. You only wire the left and right turn-signal wires to the bulbs. No brake light output is required. For the brake light, the left and right turn-signal filaments light together. These are inputs 25, 26, 27 and 28.
You can check out page 30 of the manual for more details.
Once you figure out what you need in the car, you just pick the inputs that you need and wire them to the column. This schematic will show you how to wire the MASTERCELL inputs to the GM, IDIDIT and Flaming River columns.
Off of one ISIS Power system, you have complete flexibility in how you wire your turn signals on your car.
Enough Wire for 2 Round Trips to Munich...
We get tons of calls from customers telling us how complicated their existing wiring is in their cars: tangles of wire, dozens of relays, mystery splices and tons of unknowns. A big chunk of our customers are starting with a clean slate when they install ISIS into their cars. Another group is using ISIS to replace the existing harness in their car.
Over here at ISIS Power, we all came from the automotive world: engineering, manufacturing and selling products for the tier 1's, ultimately serving the OEMs. I have seen manufacturing plants for practically all of the OEM's and they are amazing things. One plant that stands out is the original BMW assembly plant in Munich. The building where they originally assembled airplane engines is now their center for the 3-Series. I recently found this video highlighting their assembly plant in Spartanburg, South Carolina. It is amazing to watch but there are some startling statistics on the wiring harnesses for their cars. Check it out here.
Passenger cars are a complex web of electrical systems. Everything from engine management, safety systems, lighting, climate control and infotainment has to be interconnected. The harnesses for most passenger cars come into the process in large duffel bags. These can weigh several hundred pounds. You can see how they do this in the car in the BMW video.
There were two starting facts that I learned when I watched this. First, they actually heat up the harness assembly to make it easier to route through the chassis. This makes a lot of sense but I don't recommend this to the folks at home. The second fact is that there is 16,000 miles (yes, miles) of wire in the X5, roughly enough wire to stretch from our offices in Chicago to BMW's headquarters in Munich and back, twice. That is a staggering amount of wire.
Now, most of our customers' cars are far simpler than the X5, but with a traditional wiring harness it can feel like there is 16,000 miles of wire in the car. Click here to learn more about how the ISIS Intelligent Multiplex System can make wiring your car a simple process.
Sunday, October 3, 2010
Self-Canceling Turn-Signals...
We build a lot of functionality into ISIS. One system can work for a broad range of cars and other vehicles. We make our standard front-engine configuration for our 3-Cell Kit as inclusive as possible. With no changes, you can use it to wire a kit car, a muscle car, a hot rod or a race car.
One example is turn-signals. Built right into our standard front-engine configuration is the ability to operate your directional indicators with complete flexibility.
Self canceling turn signals are used where the car doesn’t have a steering column with a mechanical canceling mechanism. This is common in most Cobra kit cars and late 1960’s British cars. These cars usually have a toggle switch on the dash with a position for left and right. After you complete the turn, you needed to manually turn off the directional switch.
With our self-canceling turn signals, you have a momentary switch for left and right. When you push the switch in one direction, the outputs on the front and rear POWERCELLs will flash for that direction. They will continue to flash for approximately 15 seconds, then turn off. We build some intelligence into this part of the system. The turn-signal bulbs will not self-cancel while your foot is on the brake pedal. Imagine you are waiting at a traffic light waiting to make a right turn. You press the switch for the right turn-signal. Those lights will flash for as long as your foot is pressing on the brake plus 15 seconds. The light turns green, you take you foot off of the brake pedal and roll into your turn. When you make the turn, the right turn signal lights turn themselves off. This is build directly into ISIS and requires no external modules to make it happen.
Thursday, September 30, 2010
Fireandfuel Hits MOPAR Action...
I wanted to get out an update from the FireandFuel team in Canada. Dave Hartnell has been one of the earliest adopters of ISIS. They were actually one of the first shops to use ISIS for sequential turn signals. Check out this video.
They built a tremendous 1968 GTX for a customer that has been cleaning up the awards. It was just featured in the October 2010 edition of MOPAR Action.

There is a great bio available on Ken Jansen plus some good details on his '68 GTX. You can check it out here.
Check out the For a Few Dollars More acticle in the October 2010 edition of MOPAR Muscle to see the car and the level of work that Dave does.
He is in the middle of wiring a few more cars with ISIS so watch the blog for more updates from Fireandfuel.
Wednesday, September 29, 2010
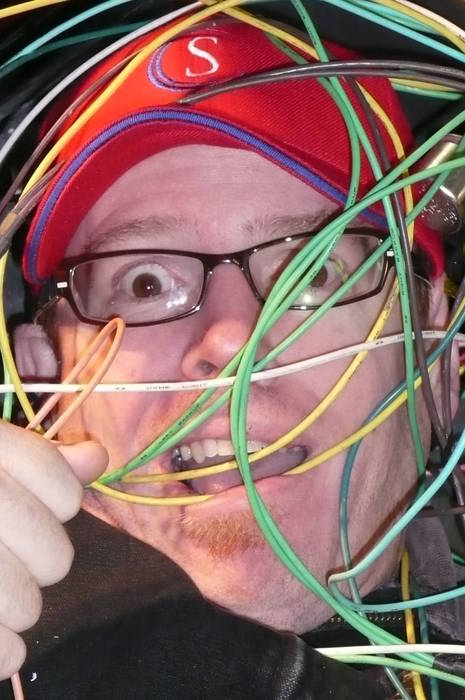
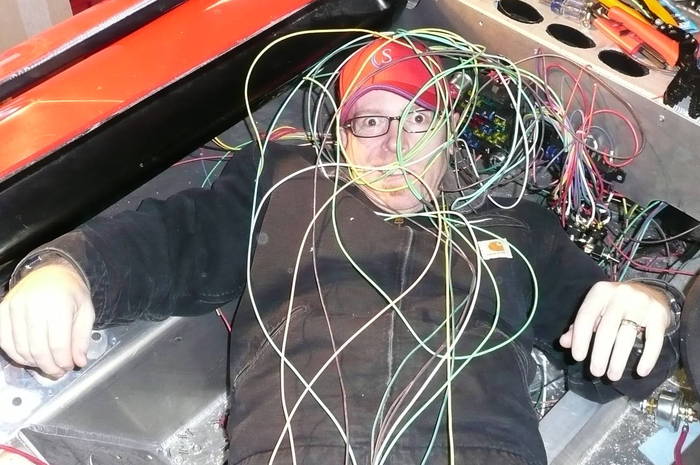
Wiring Humor...
Okay, I saw these pictures on the GT40 forum and found it funny enough to pass on.
We know that wiring a car can be a daunting project, even for something very basic. We read about completed cars and talk to guys who have dozens of relays stuffed behind the dash. Guys talk about hundreds of feet of wiring with dozens of extra connections to make things work. This guy in particular must feel a little overwhelmed with his traditional wiring system.
Our goal from day one has been to simplify wiring your car, to let you install your electrical system in less time and to give you more features. Check out http://www.isispower.com/ to learn more.
Thanks to BigB98 on the GT40 forum for the humor.
Friday, September 24, 2010
Wiring Turn-Signal Indicators with ISIS...
We received two related questions this week about turn signal indicators. The first question was how to wire the turn-signal indicators on the dash. This is very simple. Essentially, you are going to splice off of the turn-signal outputs on the front POWERCELL and bring these connections back to the lights on the dash. Typically, the left and right turn-signal outputs on the front POWERCELL are brown and violet wires respectively. The dash indicators, whether they are incandescent or LED, pull very little current. You can use a 22-AWG wire to make this connection.
The left & right indicators on the dash gets power when the POWERCELL is supplying power to the left or right turn signal bulbs. This is pretty simple.
We had another customer with a late 1960's British car who had an interesting question. He only has one turn-signal indicator bulb on the dash and wanted to know how to wire that into ISIS. Essentially, the bulb is supposed to flash when either the left or right turn-signals are on.
With ISIS, this is a very simple problem to solve. You are going to wire the turn-signal indicators just like you would if you had independent bulbs. The big difference is that you are going to connect the wires from the left & right turn signals to the same terminal on the indicator light. But, you need to put a diode between each output wire and the light. Remember that a diode acts like a check valve only allowing current to flow in one direction. Without the diodes, all of the turn-signals would turn on a the same time if there was no way to block the current from one to the other. The diode eliminates the cross talk from the left and right sides of the car. Check out the new application note on the http://www.isispower.com/ website.

The diode can be any blocking or rectifier diode. A popular part number is 1N4001. These are available at any Radio Shack or can be purchased online from companies like Mouser and Digikey. Note that the orientation of the diode in the circuit is important.
You can download this schematic from our reference library here.
The left & right indicators on the dash gets power when the POWERCELL is supplying power to the left or right turn signal bulbs. This is pretty simple.
We had another customer with a late 1960's British car who had an interesting question. He only has one turn-signal indicator bulb on the dash and wanted to know how to wire that into ISIS. Essentially, the bulb is supposed to flash when either the left or right turn-signals are on.
With ISIS, this is a very simple problem to solve. You are going to wire the turn-signal indicators just like you would if you had independent bulbs. The big difference is that you are going to connect the wires from the left & right turn signals to the same terminal on the indicator light. But, you need to put a diode between each output wire and the light. Remember that a diode acts like a check valve only allowing current to flow in one direction. Without the diodes, all of the turn-signals would turn on a the same time if there was no way to block the current from one to the other. The diode eliminates the cross talk from the left and right sides of the car. Check out the new application note on the http://www.isispower.com/ website.
The diode can be any blocking or rectifier diode. A popular part number is 1N4001. These are available at any Radio Shack or can be purchased online from companies like Mouser and Digikey. Note that the orientation of the diode in the circuit is important.
You can download this schematic from our reference library here.
Monday, September 20, 2010
ISIS Power Coverage in Kit Car Builder...

Jim Youngs, editor of Kit Car Builder, did a great install of our standard 3-Cell Kit with inLINK in a Thunder Ranch Porsche RSK Spyder replica. He documented his wiring job in a very thorough article in the August 2010 edition.
For those building kit cars (or components cars which is the new vogue term), this is a great magazine for you. It is the last magazine standing that covers building these cars. Overall, it is well written with tons of informative articles. You can learn more about the magazine here.
In Jim's article covering ISIS, he does a step-by-step install in the RSK. It is a small car, with very basic electrical functions, but he still gets the benefits of multiplexing the wiring harness.
This is just one example of the many magazines that have covered the benefits of the ISIS Inteligentl Mulitplex System. You can see more of then in our media section here.
Thursday, September 16, 2010
How to wire your door locks with central locking...
Okay Guys,
When we brought inMOTION to the market, it gave you a very flexible way to manage accessories in the car that had to be reversed. The most popular example is wiring a power window. Another good application is wiring power door locks.
If you are using a 5-wire lock actuator, you can use the built in switches to do central locking. Essentially, there are no buttons in the car to work the locks. Manually pulling up on the door lock plunger would unlock all doors. Pressing down on the lock plunger would lock all doors.
One of the most popular lock actuators out there is the kit by Electric-Life. These guys are literally down the road from us and they have a great technical support team. Here is their popular 5-wire actuator.


Here's what you do. inMOTION is going to connect to the the red and blue wires going to the lock solenoids. You are going to wire both of the solenoids in parallel with inMOTION. You need to to a little work here to get the wires connected in the right direction. These solenoids are designed to mount any way in the door. That means that there is no set lock and unlock direction. You need to reference the instructions that came with your inMOTION Cell Kit and use these as a guide.
There are 5 outputs on inMOTION. Pick the one that you are going to use for the locks. The instructions show you the wire colors for the pairs of wires for each output. After you get the lock solenoid mounted in the door, temporarily connect the output wires from inMOTION to the lock solenoid. There are manual buttons for each output on the inMOTION Cell. You can use these to cycle the solenoid to determine the correct direction before you permanently wire it up. Use the picture on page 2 as a reference. The buttons each are labeled in the picture U and D for Up and Down. Also, the groups are switches are labeled F1 through F5. These correspond to the output number on inMOTION.
The solenoid should lock when you press the Down button and unlock when you press the Up button. Imagine pulling up the plunger or pushing it down to unlock or lock the door. If the action is reversed, flip the red and blue wires on the output wires for inMOTION.
Once you have this done, you need to wire the MASTERCELL inputs to the brown and purple wires on the solenoids. Just like the red and blue wires, you need to figure out which wire is for the lock and which is for unlock. The easiest way to do this is to use a multimeter set on resistance. Start with the purple wire and measure for resistance between it and ground. Use your fingers to push the plunger in and out. In one direction, the resistance will be very high or an open circuit. In the other direction, the resistance will be low, less than 1 Ohm. The purple wire is the switch for whichever direction has the low resistance to ground. Repeat this process for the brown wire to check.
The wire that shows low resistance in the lock direction should connect to the MASTERCELL input wire for the down action for the inMOTION output that you connected to the solenoid. The wire that shows low resistance in the unlock direction on the lock solenoid should connect to the MASTERCELL input wire for the up action for the inMOTION output that you connected to the solenoid.
So here is an example. Let's say that you choose output 5 on inMOTION for your door locks. You are going to connect the White and Grey wires coming off of the output harness on the inMOTION cell to the Red and Blue wires on the lock solenoids. Orienting your inMOTION cell per the picture in the instructions, you are going to press the buttons labeled U & D in the lower left of the area under the cover to check the direction of the solenoids. They should lock when the D button is pressed and they should unlock when the U button is pressed. Reverse the White and Grey wires from inMOTION to the Red and Blue wires on the solenoid if necessary.
Now for the inputs. Let's say that the purple wire measures low resistance to ground when you press the solenoid plunger in the lock direction and the brown wire measures low resistance to ground when press the solenoid plunger in the unlock direction. Refer back to the table in the inMOTION instructions for the MASTERCELL wire colors. Remember that lock is down and unlock is up. Since the purple wire connects to ground in the lock direction, that wire connects to input 36 which is the Tan wire with the Red stripe. The brown wire connects to ground in the unlock position so that wire connects to input 37 which is the Tan wire with the Black stripe.
Once the wiring is done, train the inMOTION cell per the instructions. Make sure that the solenoids are in the unlocked position before you start the training sequence.
This diagram shows the Electric-Life 2-door kit. Wiring the 4-door kit is exactly the same, just you wire the 4 solenoids the same way as the two.
You can down load this application note here. You can find this note and many others in our reference library at www.isispower.com.
When we brought inMOTION to the market, it gave you a very flexible way to manage accessories in the car that had to be reversed. The most popular example is wiring a power window. Another good application is wiring power door locks.
If you are using a 5-wire lock actuator, you can use the built in switches to do central locking. Essentially, there are no buttons in the car to work the locks. Manually pulling up on the door lock plunger would unlock all doors. Pressing down on the lock plunger would lock all doors.
One of the most popular lock actuators out there is the kit by Electric-Life. These guys are literally down the road from us and they have a great technical support team. Here is their popular 5-wire actuator.

There are 5 wires on these actuators. The black wire is ground. The red and blue wires move the plunger in and out. The brown and purple wires are for the internal switches for central locking.
We have created a new app note that shows you how to wire these door lock solenoids with central locking to the ISIS 2 or 3-Cell Kit with inMOTION.
Here's what you do. inMOTION is going to connect to the the red and blue wires going to the lock solenoids. You are going to wire both of the solenoids in parallel with inMOTION. You need to to a little work here to get the wires connected in the right direction. These solenoids are designed to mount any way in the door. That means that there is no set lock and unlock direction. You need to reference the instructions that came with your inMOTION Cell Kit and use these as a guide.
There are 5 outputs on inMOTION. Pick the one that you are going to use for the locks. The instructions show you the wire colors for the pairs of wires for each output. After you get the lock solenoid mounted in the door, temporarily connect the output wires from inMOTION to the lock solenoid. There are manual buttons for each output on the inMOTION Cell. You can use these to cycle the solenoid to determine the correct direction before you permanently wire it up. Use the picture on page 2 as a reference. The buttons each are labeled in the picture U and D for Up and Down. Also, the groups are switches are labeled F1 through F5. These correspond to the output number on inMOTION.
The solenoid should lock when you press the Down button and unlock when you press the Up button. Imagine pulling up the plunger or pushing it down to unlock or lock the door. If the action is reversed, flip the red and blue wires on the output wires for inMOTION.
Once you have this done, you need to wire the MASTERCELL inputs to the brown and purple wires on the solenoids. Just like the red and blue wires, you need to figure out which wire is for the lock and which is for unlock. The easiest way to do this is to use a multimeter set on resistance. Start with the purple wire and measure for resistance between it and ground. Use your fingers to push the plunger in and out. In one direction, the resistance will be very high or an open circuit. In the other direction, the resistance will be low, less than 1 Ohm. The purple wire is the switch for whichever direction has the low resistance to ground. Repeat this process for the brown wire to check.
The wire that shows low resistance in the lock direction should connect to the MASTERCELL input wire for the down action for the inMOTION output that you connected to the solenoid. The wire that shows low resistance in the unlock direction on the lock solenoid should connect to the MASTERCELL input wire for the up action for the inMOTION output that you connected to the solenoid.
So here is an example. Let's say that you choose output 5 on inMOTION for your door locks. You are going to connect the White and Grey wires coming off of the output harness on the inMOTION cell to the Red and Blue wires on the lock solenoids. Orienting your inMOTION cell per the picture in the instructions, you are going to press the buttons labeled U & D in the lower left of the area under the cover to check the direction of the solenoids. They should lock when the D button is pressed and they should unlock when the U button is pressed. Reverse the White and Grey wires from inMOTION to the Red and Blue wires on the solenoid if necessary.
Now for the inputs. Let's say that the purple wire measures low resistance to ground when you press the solenoid plunger in the lock direction and the brown wire measures low resistance to ground when press the solenoid plunger in the unlock direction. Refer back to the table in the inMOTION instructions for the MASTERCELL wire colors. Remember that lock is down and unlock is up. Since the purple wire connects to ground in the lock direction, that wire connects to input 36 which is the Tan wire with the Red stripe. The brown wire connects to ground in the unlock position so that wire connects to input 37 which is the Tan wire with the Black stripe.
Once the wiring is done, train the inMOTION cell per the instructions. Make sure that the solenoids are in the unlocked position before you start the training sequence.
This diagram shows the Electric-Life 2-door kit. Wiring the 4-door kit is exactly the same, just you wire the 4 solenoids the same way as the two.
You can down load this application note here. You can find this note and many others in our reference library at www.isispower.com.
Thursday, September 2, 2010
Wiring the ignition and starter with a 3-Position Switch
We just had a customer email us with a good question about his 3-Cell Kit. He wants to use a three position toggle switch to control his car's ignition and starter. The switch is off in the down position, on in the middle and momentary in the up position. The switch that he wants to use is sold by Longacre Racing. Their part number is 45490.
This is an easy one to wire to the ISIS MASTERCELL. The common terminal on the switch gets tied to ground. The middle position gets connected to input 3 on the MASTERCELL. This is the white wire with the blue stripe. Input 4 on the MASTERCELL, the white wire with the yellow stripe, connects to the momentary terminal on the switch. As it is wired, the ignition input to the MASTERCELL will be on in the middle position and the starter input will be on in the momentary position. Since you need to have the ignition system powered when you are cranking the engine, you need to put a diode between the ignition and starter terminals. See the diagram for more details.

You can download this diagram and many others to help to wire your car from our reference library here.
This is an easy one to wire to the ISIS MASTERCELL. The common terminal on the switch gets tied to ground. The middle position gets connected to input 3 on the MASTERCELL. This is the white wire with the blue stripe. Input 4 on the MASTERCELL, the white wire with the yellow stripe, connects to the momentary terminal on the switch. As it is wired, the ignition input to the MASTERCELL will be on in the middle position and the starter input will be on in the momentary position. Since you need to have the ignition system powered when you are cranking the engine, you need to put a diode between the ignition and starter terminals. See the diagram for more details.
You can download this diagram and many others to help to wire your car from our reference library here.
Wednesday, September 1, 2010
Check out ISIS Power on Hub Garage...
Okay Guys,
As we spread the word about ISIS Power, we've just hung out our virtual shingle at Hub Garage. You can check us out at www.hubgarage.com/mygarage/isispower. It's a great gear-head environment and it will be another place where you can learn more about ISIS Power products and how you can simplify the wiring in your car.
Check it out.
Sunday, August 29, 2010
ISIS inMOTION Demo Video- Part 3
Okay Folks,
This is the last video in our inMOTION Motor Controller Cell series. This one shows you how to connect inMOTION into a standard 2 or 3-Cell Kit, how to connect the outputs and how to train the cell.
inMOTION gives you a much simplier way to wire electricals functions that need to be polarity controlled. This includes wiring window lift motors, lock solenoids, convertible tops, linear actuators and headlight covers. Check out the video here.
This link will take you to more details on inMOTION.
This link will take you to the installation instructions for inMOTION.
ISIS inMOTION Demo Video- Part 2
Okay...
Here is the second video in our ISIS inMOTION Motor Controller Cell series. This one goes through more details on how inMOTION can simplify wiring car functions that need to have polarity reversing. This includes things like wiring window motors, lock solenoids, convertible tops, linear actuators and headlight covers.
Check out the second video here.
This link will take you to more details on inMOTION.
This link will take you to the installation instructions for inMOTION.
ISIS inMOTION Demo Video- Part 1
Okay Folks,
We're producing a lot of videos to show you the specific functions of the ISIS Intelligent Multiplex System. That way we can show you exactly how ISIS can help you simplify wiring your car. We just finished a series of clips on our new ISIS inMOTION Motor Controller Cell. There are three in the series.
inMOTION is an accessory that seamlessly integrates into our 2 or 3-Cell Kits. It gives you complete control over electrical accessories that need to have polarity reversing to make them work correctly. This includes things like window motors, convertible tops, lock solenoids, linear actuators and headlight covers. I demonstrate the system using the setup that we created for the 2010 National Street Rod Association show. Watch the video here.
This link will take you to more details on inMOTION.
This link will take you to the installation instructions for inMOTION.
Wednesday, August 25, 2010
Wiring a Ford Mini Starter...
Okay Guys,
We get asked this question a lot. To use the Ford remote starter solenoid or not to use, that is the question.
The standard architecture in the Mustang is to use the remote solenoid to switch the power going to the coils of the solenoid integrated into the Mini Starter. This is a remnant from when Ford did not integrate the solenoid in the starter. If you think about what is going on here, you are using a switch (the key) to send power to one solenoid (the remote solenoid) to send power to a second solenoid (the one integrated into the starter assembly).
If you wanted to wire the system with ISIS the same way as the original schematic, you would connect the starter output on the POWERCELL, usually the light-blue wire, to the coil terminal on the remote solenoid. When the MASTERCELL sees the starter switch close, the POWERCELL sends power to the remote solenoid, which sends power to the solenoid on the Mini Starter. This link will take you to the schematic in our reference library that shows how to wire it the Ford way.
http://www.isispower.com/filebase/src/Installation_Guides/Littelfuse-ISIS-ignition-starter-combo.pdf
A lot of guys use this approach because it is how it was done in the car originally. Some customers have also told us that they like this approach because it gives them a stud that is easy to access to connect constant 12-volt cables.
The easier way to do this is to connect the output on the POWERCELL directly to the starter terminal on the starter assembly. That way when the MASTERCELL sees the input from the ignition switch, it commands the POWERCELL to send power to the integrated solenoid, which cranks the motor.
The power going to the starter solenoid looks no different to ISIS than a headlight or a door popper. As far as we can tell, Ford is the only OEM that uses this separate solenoid to power the starter solenoid.
Friday, August 13, 2010
Thanks to all for Visiting ISIS Power at the NSRA Show...
Okay Guys,
We're mostly caught up after spending most of last week in Louisville for the NSRA Nationals. I still don't know the final number, but they were estimating that there would be about 14,000 cars there on Saturday. I was on street-rod-overload by the time we packed up the truck on Sunday.
We had a chance to meet and talk with a lot of great people in the booth. Many existing customers and fans came by plus lots of new faces that wanted to learn more about how ISIS can help them simplify the wiring in their cars.
The NSRA is an interesting group because of the variety of cars that the members own. From very simple open-top hot rods to complicated lead sleds with power everything, ISIS has a place in all of these cars. We talked to guys with rat's nests of wire that need a way to simplify their electrical systems. Many other guys came to us because they were looking for that unique function in their car that would make it stand out from the others.
Our new inMOTION Motor Controller Cell was very well received. This cell is a very logical extension to our basic MASTERCELL and POWERCELL. Guys were blown away with how simple it can be to wire window motors, lock solenoids, convertible top motors and linear actuators. This is functionality that you just can't get with a traditional automotive wiring harness.
Thanks for all who came by the booth. Now it is time to get ready for SEMA.
Watch the NSRA website for pictures from the event.
Thursday, August 12, 2010
New Configuration for ISIS 2-Cell Kit with V10.7
We have a new software configuration for our ISIS 2-Cell Kits. Based on feedback from guys installing this particular version of the kit.
Our 3-Cell Kit is our most popular. Guys use this to wire everything from restorations, to street rods, to hot rods, to rest mods, to kit cars, to off-road vehicles.
At the same time, there are cars that are very basic. Guys want the flexibility and power of wiring their car with ISIS but don't need all 20 outputs. This includes racing, basic hot rods and tuners. The 2-Cell Kit is the answer to these wiring problems.
Just like the 3-Cell Kit, the 2-Cell Kit gives you everything that you need to wire head lights, turn signals, ignition systems, starter solenoids, fuel pumps and parking lights. Instead of 2 POWERCELLs, you are wiring to one for a total of 10 switched outputs.
The new configuration is in version 10.7 of the ISIS code and arranges the outputs exclusively on the A connector so there is no need to use the second input harness on the MASTERCELL. This simplifies wiring the switches. You can check out the configuration sheet here.
You can also see all of the different configurations that we offer for the ISIS Intelligent Multiplex System in the Reference Library section of our website under the Owner's Manual section.
Tuesday, August 10, 2010
Updated GM-Steering Column Wiring Diagram...
Okay Folks,
We just posted a new application note showing how to connect the ISIS MASTERCELL to any GM-style steering column.

This includes wiring for the horn, turn-signals and 4-way flashers. This schematic also shows how to wire in the turn-signals so that they only operate when the ignition is on. You can get the PDF of this application note at this link.
There are many other application notes that will help you wire your car with the ISIS Intelligent Multiplex System. Check them out in our reference library.
We just posted a new application note showing how to connect the ISIS MASTERCELL to any GM-style steering column.
This includes wiring for the horn, turn-signals and 4-way flashers. This schematic also shows how to wire in the turn-signals so that they only operate when the ignition is on. You can get the PDF of this application note at this link.
There are many other application notes that will help you wire your car with the ISIS Intelligent Multiplex System. Check them out in our reference library.
Friday, July 30, 2010
The Singer 911
We deal with a lot of unique customers with great cars. One that is getting very busy in the market is Singer Vehicle Design. They just announced the completion of their first production Singer 911.

Here's how they describe it in their own words...
The Singer 911 Concept attempts to channel the spirit of the delicate 1960's original, the race bred chic of the '70's long hoods, the '80's bomb-proof solidity and the power and sophistication of the 964/993 series: a single jewel-like form that represents and celebrates the golden era of the world's most important sports car.
They meld the old with the new in their Singer 911, a truly unique car in the resto-mod world. We first started working with them about a year ago on their prototype, which has been been praised in the media including by the typically skeptical team at Top Gear. Their production model is wired with our 3-Cell Kit with inMOTION. They even have the ISIS Intelligent Multiplex System tied into the transmission so that the rear wing is actuated based on road speed.
They have a great website with lots of pictures, testimonials and specs on the car. Check it out here.
Monday, July 26, 2010
Low and High-Beams...
A lot of guys ask about how to wire in the floor-mounted headlight switch with ISIS in their car. One of our customers building a 1967 Cougar asked this exact question today.
There are two different ways that you can wire this switch.
One way is to use the switch to control inputs to the MASTERCELL. Check out "Wiring Headlights and High-Beams" on page 28 of the new manual for more details. Connect the high-beam input to what was the power feed for the switch. The connection to the low-beam input should connect to what was the high-beam terminal on the switch. The third terminal of the switch is unused.
The other way only uses one output from the front POWERCELL for headlights and high-beams. Connect the white output from the front POWERCELL to the power input terminal switch on the floor. Then connect the headlights and high-beams to their respective terminals on the switch. When you turn on the headlights, you get power to the front bulbs. Hitting the switch on the floor will switch from low to high-beams. The biggest benefit of doing it this way is that you save the high-beam output to use for something else.
Keep watching our Reference Library for more tips and tricks.
Friday, July 23, 2010
FAST EZ-EFI, Fuel Pump Control and ISIS...
We had a customer just ask a question on our website about integrating the Fuel Air Spark Technology (FAST) EZ-EFI system. He wanted to know how to control his in-tank fuel pump with our ISIS Intelligent Multiplex System and the EZ-EFI system.
If you look at the instructions that FAST gives you for the EZ-EFI™ Self Tuning Fuel Injection System, they detail the connections to their EFI wiring harness. There is a wire in their harness labeled "Fuel Pump Relay". This is designed to ground the coils of the fuel pump relay. Here is the diagram from the FAST manual.

You can download their entire manual here.
You connect the fuel pump input on the MASTERCELL directly to this wire on the EFI controller. In the ISIS standard front-engine configuration, this is input 19 which is the Tan-Yellow input wire. Essentially, you are replacing the fuel pump relay with ISIS.
When the EFI controller wants the fuel pump to turn on, it closes the "Fan Pump Relay" circuit to ground. This grounds the input to the MASTERCELL, which sends a command to the rear POWERCELL to turn on output 10, which energizes the fuel pump. There is no need to run any additional wire to the back of the car from the EFI controller. This command is carried through the ISIS CAN cable from the MASTERCELL to the rear POWERCELL.
Check out our reference library to get other tips and tricks on how to simplify wiring your car at www.isispower.com.
If you look at the instructions that FAST gives you for the EZ-EFI™ Self Tuning Fuel Injection System, they detail the connections to their EFI wiring harness. There is a wire in their harness labeled "Fuel Pump Relay". This is designed to ground the coils of the fuel pump relay. Here is the diagram from the FAST manual.
You can download their entire manual here.
You connect the fuel pump input on the MASTERCELL directly to this wire on the EFI controller. In the ISIS standard front-engine configuration, this is input 19 which is the Tan-Yellow input wire. Essentially, you are replacing the fuel pump relay with ISIS.
When the EFI controller wants the fuel pump to turn on, it closes the "Fan Pump Relay" circuit to ground. This grounds the input to the MASTERCELL, which sends a command to the rear POWERCELL to turn on output 10, which energizes the fuel pump. There is no need to run any additional wire to the back of the car from the EFI controller. This command is carried through the ISIS CAN cable from the MASTERCELL to the rear POWERCELL.
Check out our reference library to get other tips and tricks on how to simplify wiring your car at www.isispower.com.
Tuesday, July 20, 2010
Come see the ISIS Power Team at the 2010 NSRA Nationals...

Come out to the 2010 National Street Rod Nationals to meet with the ISIS Power team and experience the ISIS Intelligent Multiplex System. The show will be held from August 5th through the 8th at the Kentucky Expo Center in Louisville, KY.
The team will be out there at booth 736B with demonstrations set up of our standard 3-Cell Kit. Plus we will be showing our new inRESERVE Battery Monitoring System and our inMOTION Motor Controller Cell. You can get some hand-on experience with our products to see how ISIS can help simplify wiring your car and get you more functionality.
You can check out the NSRA website for details on the show, including directions and show hours.
Check out our news section on the ISIS Power website for more details on the show and other upcoming events.
Monday, July 19, 2010
A great wiring reference...
A lot of customers call us looking for tips on the nuts and bolts of wiring a car while they are installing their ISIS Intelligent Multiplex Systems: how do I strip wire? What does a good crimp look like? Are butt slices okay?
We think that we know a lot about wiring, but we met a guy about 6 months ago who literally wrote the book.

Tony Candela is an Arizona-based author and all-around-car-guy. His book, Automotive Wiring and Electrical Systems, has become the new reference for everyone in the industry.
This is a great reference that every guy should have on the shelf in his garage. It has 144 pages of wiring tips, tricks and good advice. It is written in plain English with tons of pictures. Plus it just won the 2010 International Automotive Media Award for technical excellence.
Steve of Steve Meade Designs did this quick video on YouTube walking you through the book.
You can get more details from Tony's website by clicking here.
Grounds, grounds, grounds...

Okay... regardless of the electrical system you are putting in any car, problems with grounds account for over 90% of any of the issues that you may have. This is true for our ISIS Intelligent Multiplex System, any EFI controller, stereos, amplifiers, even traditional relays. There are few things more important when wiring a car than your connection to ground.
This starts with something fundamental: a good metal-to-metal connection. When creating a ground connection, make sure that all of the metal surfaces are clear and clean. This means removing any rust, paint, powder coat, clear coat that may get in the way.
Second, you have to protect these joints from corrosion. A good ground today, may degrade over time as the junctions get dirty and corrode from normal driving.
Finally, remember that what goes in must come out. Make sure that your ground connections are sized to handle current. I mentioned before that the most common mistake that guys make when wiring their cars is to under size the cable from the battery to the starter. Well, the second most common is to under size their ground cable. A OO gauge wire from the positive side of the battery to the starter is useless if the negative terminal connects to the chassis through a 6-gauge wire. Same thing when you think about ground straps from the engine block to the chassis.
Remember that that ground has to carry the alternator current plus the starter current. A 14-gauge wire between the block and the chassis will measure good continuity with a meter but will cause a lot of problems when you crank the motor.
Keep an eye on the ISIS Power Reference Library. We're creating a few tutorials on grounds. These will have our recommendations on where to put them, how to prepare the surfaces, the types of hardware to use and how to size the cables. I'll post them up on the blog too when they are done.
Friday, July 16, 2010
Check out ISIS on Lokar Car Show TV...
For those who didn't catch this on the Fox Sports Network earlier in the week, here is the piece that MastersTV produced for Lokar Car Show TV. Cathy Fisher interviewed me in our booth at the 2010 Hot Rod & Restoration Show in Indianapolis. It is a quick exceprt from the interview talking about the ISIS Intelligent Multiplex System, car wiring and our standard one-button start feature.
You can check out this video and many others in the media section of the ISIS Power website.
You can check out this video and many others in the media section of the ISIS Power website.
Sunday, July 11, 2010
How to modify the S2000 start button for illumination...
Okay... we had a customer ask us a very good question about wiring into the S2000 switch. We missed the switch illumination in our last app note and this raises an inportant point on how the MASTERCELL inputs work on ISIS.
Remember that all of the inputs are pulled to ground. Also, remember that we build a significant amount of circuit protection into the system. This means that we protect all of the inputs on the MASTERCELL from electrostatic discharge (ESD).
I just happen to know a thing or two about ESD. In a previous life, I managed a piece of business that made suppressors for ESD. Some of these parts were board mounted surface mount components. Other parts were inserted into connectors for high-end aerospace and military applications. I even published a few papers on really esoteric high-bandwidth testing methodologies for transmission line pulse testing.
Anyway, the diode arrays that we use to protect the inputs from ESD are sensitive to DC voltages above 9 volts. This means that you cannot apply the battery voltage to any of the MASTERCELL inputs. When you wire ISIS into your car, you have to take care to make sure that the inputs are only connected to ground.
So, to make the illumination work for the S2000 switch, you need to physically separate the power to the internal light bulb from the contacts for the switch. This is very easy to do and it should take you less than 15 minutes. We added a second S2000 switch app note to our Reference Library.

You can get the full note at this link. Plus you can access our full library of application notes to help you wire your car with our ISIS Intelligent Multiplex System.
Remember that all of the inputs are pulled to ground. Also, remember that we build a significant amount of circuit protection into the system. This means that we protect all of the inputs on the MASTERCELL from electrostatic discharge (ESD).
I just happen to know a thing or two about ESD. In a previous life, I managed a piece of business that made suppressors for ESD. Some of these parts were board mounted surface mount components. Other parts were inserted into connectors for high-end aerospace and military applications. I even published a few papers on really esoteric high-bandwidth testing methodologies for transmission line pulse testing.
Anyway, the diode arrays that we use to protect the inputs from ESD are sensitive to DC voltages above 9 volts. This means that you cannot apply the battery voltage to any of the MASTERCELL inputs. When you wire ISIS into your car, you have to take care to make sure that the inputs are only connected to ground.
So, to make the illumination work for the S2000 switch, you need to physically separate the power to the internal light bulb from the contacts for the switch. This is very easy to do and it should take you less than 15 minutes. We added a second S2000 switch app note to our Reference Library.
You can get the full note at this link. Plus you can access our full library of application notes to help you wire your car with our ISIS Intelligent Multiplex System.
Tuesday, July 6, 2010
ISIS Power on Lokar Car Show TV...
Tune into the Fox Sports Network on July 11th at 11:00 AM Eastern to watch ISIS on Lokar Car Show TV. The MastersTV team interviewed ISIS Power president, Jay Harris at the 2010 Hot Rod & Restoration show in Indianapolis, IN. They'll chat about the ISIS Intelligent Multiplex System and how you can simplify wiring your car plus get a more powerful and functional electrical system.
The show airs again at 4:00 PM Eastern on Monday July 12th. Check with your local cable provider for details.
The show airs again at 4:00 PM Eastern on Monday July 12th. Check with your local cable provider for details.
Thursday, July 1, 2010
Wiring ISIS POWERCELL to Ford OBDI EEC Module...
Okay Guys,
We were asked today how to wire ISIS to a Ford OBDI EEC module. This customer in particular did one of the first 4.6L transplants into a Mustang. The donor car was a 1991 Lincoln Town Car.
We'll get some prettier drawings of this, but here is how you would wire the outputs on the ISIS POWERCELL to the harness of the Ford EEC module.
These two wires are hot all the time.
Yellow/Black wire connects directly to B+ through a 30-amp fuse.
Pink/Black wire connects directly to B+ through a 20-amp fuse.
The Dark-Blue/Orange wire needs to get voltage when the starter is cranking. Splice this wire into the starter output off of the POWERCELL.
If you are using the EEC Power Relay with the EEC Power Diode, connect the Red/Light-Green wire to the Ignition output on the POWERCELL. If you are not using the EEC Power relay, you can connect the red-wire from splice S129 to the Ignition output on the POWERCELL.
The Green-Yellow/Yellow is the connection for the HEGO sensors. You can either use a separate output off of a POWERCELL to power this or you can use the ignition output to switch a relay to provide power to this.
You can find similar ECU wiring schematics for ISIS plus other tips and tricks at our Reference Library at www.isispower.com.
Jay
Tuesday, June 29, 2010
Integrating ISIS to Ford EFI...
I wanted to post this great resource that we found for all things related to Ford EFI. Ford Fuel Injection was created by Ryan McCormick and has tons of good information on how the Ford EFI system works and how to wire into it. Check it out here.
For all of the guys integrating ISIS into these motors, this is a great resource to help you wire the ISIS POWERCELL outputs to the switched ignition circuits.
We have several diagrams to help you connect your ISIS Intelligent Multiplex System to a variety of engine management systems. You can check them out here in our Reference Library section of our website.
Wednesday, June 23, 2010
ISIS One-Button Start and the Honda S2000 Switch...
Okay... this is a follow up to my last post on ISIS starting and security. Like I said in the last post, a lot of customers want a one-button function to start their project car that works like their daily driver. This function is completely integrated in the ISIS Intelligent Multiplex System.
Now, a lot of guys have asked specifically how to wire the Honda S2000 switch into the ISIS MASTERCELL. This is a popular switch because it is attractive, can fit into practically any dash design, it is cheap and it is easy to buy. Some of you may remember the Factory Five Roadster chassis that we had at SEMA in 2008 and the NSRA Nationals in Louisville last year. We wired this switch into this car.
We spent some time on-line over the past few days reading how guys have been trying to integrate this switch into existing cars, with some difficulty. As a result, we created a new application note showing you how to wire this switch into the inputs on the ISIS MASTERCELL to start the car.

Wiring this switch into a car demonstrates one of the big features of the MASTERCELL inputs. When you turn on an input, you are just sending a signal to the MASTERCELL to do its job. Less than 1 milliamp actually flows through he switch. That means that you can connect switches like the S2000 start button directly to the MASTETRCELL inputs with no need for relays. All of the wiring examples that we found on-line require relays to integrate this switch into a traditional harness.
In the case of the Cobra chassis that we had at SEMA, the owner wanted a military set of switches on the dash. He is a former Army helicopter pilot who flew Blackhawks in Desert Storm. He had wanted a toggle switch with a safety cover on it for the ignition. This switch was connected to the ignition input going to the MASTERCELL. Turning on this switch provided power to his MSD 6AL. The S2000 switch was connected to the starter input to the MASTERCELL. To start the car, he flips on the ignition toggle then presses the engine start button. To shut down the motor, he turns off the toggle switch. Pretty simple.
Likewise, you can use this switch with the ISIS One-Button Start personality just like I described in the last blog post.
You can find this application note and many more in our reference library at www.isispower.com. Click here to check it out.
Jay
Now, a lot of guys have asked specifically how to wire the Honda S2000 switch into the ISIS MASTERCELL. This is a popular switch because it is attractive, can fit into practically any dash design, it is cheap and it is easy to buy. Some of you may remember the Factory Five Roadster chassis that we had at SEMA in 2008 and the NSRA Nationals in Louisville last year. We wired this switch into this car.
We spent some time on-line over the past few days reading how guys have been trying to integrate this switch into existing cars, with some difficulty. As a result, we created a new application note showing you how to wire this switch into the inputs on the ISIS MASTERCELL to start the car.
Wiring this switch into a car demonstrates one of the big features of the MASTERCELL inputs. When you turn on an input, you are just sending a signal to the MASTERCELL to do its job. Less than 1 milliamp actually flows through he switch. That means that you can connect switches like the S2000 start button directly to the MASTETRCELL inputs with no need for relays. All of the wiring examples that we found on-line require relays to integrate this switch into a traditional harness.
In the case of the Cobra chassis that we had at SEMA, the owner wanted a military set of switches on the dash. He is a former Army helicopter pilot who flew Blackhawks in Desert Storm. He had wanted a toggle switch with a safety cover on it for the ignition. This switch was connected to the ignition input going to the MASTERCELL. Turning on this switch provided power to his MSD 6AL. The S2000 switch was connected to the starter input to the MASTERCELL. To start the car, he flips on the ignition toggle then presses the engine start button. To shut down the motor, he turns off the toggle switch. Pretty simple.
Likewise, you can use this switch with the ISIS One-Button Start personality just like I described in the last blog post.
You can find this application note and many more in our reference library at www.isispower.com. Click here to check it out.
Jay
Starting and Security with ISIS...
We spend a lot of time learning from customers about what functions they want in their cars. Everyone wants an electrical system that is easy to install and works flawlessly. That is a given. There are some guys who want simple cars: they need to be able to start the engine, turn on headlights and turns signals. That's about it.
At the same time, we find that most of the guys that come to us want more. They want their project car to have the same performance, comfort and features as their daily driver. Face it, we all have become spoiled by what our cars do for us today.
One of the most common requests that have been getting lately is to integrate push-button starting in cars. You have a few options for how you can use this switch in your car when you wire it to ISIS. Both of these are built right into ISIS and require no configuration.
The simplest is to use one switch to turn on the ignition input and a second momentary switch for the starter input. This link takes you the application note on our website that shows how to wire this.
Another option is to use our One-Button start personality. This is standard on all of our basic configurations for the 2 and 3-Cell Kit. It replicates the one-button start functions that you find in many new cars. To make this work, you wire the a button to the ISIS One-Button start input wire. That's it, only one wire. The ignition output on the POWERCELL wires to the ignition system for the engine and the starter output connects to the starter solenoid.
If you press and release the button, the ignition output turns on. Pressing and releasing it again turns the ignition off. In you press and hold the button, the ignition turns on, there is a half-second pause for the fuel pump to prime then the starter solenoid engages to crank the motor. It will crank as long as the button is pressed. Once it turns over, you take your finger off of the button. The starter solenoid drops out but the ignition is still getting power from the POWERCELL. To shut down the engine, you press and release the button again. This shuts off the power to the ignition output.
The best part of this is that with ISIS you don't need to buy any external module to get the one-button start function. It is all integrated as part of the ISIS Intelligent Multiplex System.
Now, I know your next question. You now have a car with a cool red button that you can use to start it but you have no key. How do I keep someone from stealing my car? That's where the ISIS inLINK wireless system comes in. inLINK is a very simple upgrade to our basic 2 and 3-Cell kits. It gets you wireless control over the car for things like door poppers, trunk releases and lighting. Most importantly, it gets you a powerful security system for the car. When you lock the car from the inLINK key fob, the MASTERCELL disables the inputs for the ignition, fuel pump and starter solenoid. If you try to turn on any of these inputs, you get a message on the inSIGHT LCD module on the MASTERCELL that tells you that these functions are disabled. The car cannot be started until the system is unlocked by the key fob. This function becomes completely integrated into ISIS. There are no separate modules to splice into your electrical system.
A lot of our customers use our One-Button start with no keys at all. They lock the system from the inLINK key fob and walk away from the car.
You can get more information on the ISIS One-Button Start function and inLINK at our products page by clicking here.
Jay
Monday, June 21, 2010
Stockholm or Bust...
Here's another great ISIS Intelligent Multiplex System customer story.
We have been working with Ewan Bason ever since he ordered his ISIS system in 2009. When he is not operating underwater rovers for a marine exploration company, he is restoring his 1961 VW Split Screen Panel Van. He wired the van with our standard 3-Cell Kit.
He and a friend just completed a 2,000 mile road trip from England to Stockholm. They had a few hiccups including a failed alternator, a broken windshield and a carburetor fire but they made it home. Plus they raised some money for a good charity.
You can learn more about the van, their trip and their cause at their website by clicking here.
Jay
Saturday, June 19, 2010
The ISIS Power Brand...
Okay... I like these kinds of stories.
A lot of my job is brand building. For all intents and purposes, we are starting from the bottom. We're bringing new electrical technology into a market that hasn't seen innovation in wiring since the Model T. We spend a lot of time with magazines working on editorial coverage, tons of time updating the website and the blogs, going to shows, setting up sponsorship and handling TV coverage. Most importantly, we spend a lot of time talking to customers. Our goal is to make everyone aware of ISIS, and get the same recognition as other brands like MSD, K&N and Holley. When guys think about wiring their cars, we want ISIS Power to come to their minds.
A lot of you know Chris Loubier from I Squared Engineering. They originally brought multiplex technology to the enthusiast market about 5 years ago with their Million Mile Systems and their 1+1 System. They have been our partners for a long time now. For those who know Chris or have spoken to him over the phone, he is a scary smart guy and very passionate about his technology.
Chris had an extra welder in his shop that he wasn't using so he put out an add to sell it. A few nights ago, two guys came by to look at and buy it. While one guy was checking out the welder, the second casually asked Chris what he does in his shop.
In true Chris Loubier fashion, he started to explain that he develops electrical systems for vehicles, with micro-controllers that can scale easily using multiplex technology. While he was going through the technical details of what he did, the guy interrupted him and said "Oh, you mean something like ISIS?". He knew what Chris was talking about just by his technical description.
It turns out that this guy had been reading all about us in the magazines, saw us on Two Guys Garage, even talked to me at SEMA last year. He is just started working on a Camaro project and is going to use our ISIS 3-Cell Kit to wire the car.
As I said above, I really like stories like these. It shows me that our PR and branding efforts are working. Most importantly, we have found that our customers are our best sales people and advocate for us all of the time. We're proud of the ISIS Intelligent Multiplex System and the service that we offer to our customers.
Thursday, June 17, 2010
How to Wire a Headlight Switch to the ISIS MASTERCELL...
Okay... here's another ISIS wiring example. It's hot off the press.
A lot of guys ask how to wire the headlight switch into the inputs on the ISIS MASTERCELL. It is pretty easy. Check out the application note here.

One of the biggest things that you will notice here is how small the wires are going to the switch. ISIS works differently from a traditional wiring harness. Instead of bringing power to the switch, the inputs need to be grounded. It takes less than 1 milliamp to turn on an input. This means that there is practically no current flowing through the switch, so the contacts will never wear. Additionally, you can use a very light gauge of wire to connect the switch to the MASTERCELL. All of our input wires are 22 AWG as compared to the 12 or 10 AWG wires that came on the OEM harness. This dramatically reduces the bulk of wire under the dash.
Keep watching for more tips and tricks to help you wire your car with the ISIS Intelligent Multiplex System.
Jay
Monday, June 14, 2010
Connecting the ISIS MASTERCELL to GM Steering Columns...
Okay Guys,
Another popular question that we get is how do you integrate the inputs to the MASTECELL into a GM-style steering column. The connectors for this have not changed in decades and they are used in the OEM columns and the ones made by popular companies like IDIDIT and Flaming River.
Check out the following drawing. It gives you a color-coded map to wire the inputs to the ISIS MASTERCELL to the connector on the steering column. You can get this schematic from the ISIS Power website at this link.

Check out this guide and many others on our Installation page on www.isispower.com. Let us know if you have any additional suggestions for similar guides to help you wire your car with our ISIS Intelligent Multiplex System.
Jay
Sunday, June 13, 2010
ISIS inMOTION and Camaro Headlight Covers, part 2
Hey Folks,
I wanted to post an updated video from John Parsons. He has been tinkering with the headlight covers on the Camaro that he is wiring for a customer. This car was wired with the ISIS Intelligent Multiplex System and he is using our new ISIS inMOTION Motor Control Module to control the windows, door locks and the Detroit Speed and Engineering headlight covers.
The first video that we posted was running the motors for the covers off of a 14 volt battery from a cordless drill. The action was a little fast. John has now dialed in the motion using a resistor to limit the voltage to the motors.
You can see it here.
Jay
Saturday, June 12, 2010
High-Current Loads...
One of the more common questions that we get about the ISIS Intelligent Multiplex System is what to do with high-current loads. When you wire a car, most of the loads or accessories draw 10 to 20 amps. This includes headlights, turn signals, ignition systems, starter solenoids, etc. Each of the outputs on a POWERCELL can carry up to 25-amps and the total capacity of a POWERCELL is 125-amps.
Occasionally, you do have have switched loads that exceed 25-amps. The most common example would be cooling fans but other examples could include electric power steering pumps, and very high-flow fuel pumps.
You can get the same ISIS benefits for these high-current loads as you do with ones under 25-ammps. Instead of driving the loads directly, you can use the output from the POWERCELL to power the coils of a relay. This allows the contacts of the relay to carry the full current of the load. You can size the relay to meet the demand.
Click here to download a simple schematic from the www.isispower.com website that shows you how you can use a relay with a POWERCELL output to increase the current carrying capability of the system.
You can check our reference library for additional tips and tricks to make wiring your car easier with the ISIS Intelligent Multiplex System.
Wednesday, June 9, 2010
inMOTION Controls Headlight Doors on Camaro RS...
Hello All,
We have been working with John Parsons of II Much Fabrication on a customer's Camaro RS. John is installing our ISIS Intelligent Multiplex System into Mark Deutsch's car.
As far as builds go, this one is more involved than most. Mark started with a 3-Cell Kit, added another POWERCELL and our new ISIS inMOTION Motor Controller Cell. He has a lot of functions going on in the car including power windows, locks, and headlamp covers. The original OEM covers were vacuum actuated and used a large, complicated mechanism to open and close the doors.
They replaced the OEM doors with a new electric system from Detroit Speed and Engineering. This is a very well engineered and built system that converts the door mechanism to electric actuation, taking out the old vacuum system. This link will take you to the DSE kit.
They give you a controller to drive the electric motors for the headlamp doors, but John used our new inMOTION Motor Controller Cell to drive them directly. You can get more information on our inMOTION Cell at this link.
inMOTION looks and feels like an ISIS POWERCELL. It plugs directly into an existing ISIS system but it brings a ton of new functions to the table. The POWERCELL has 10 outputs that can be turned on and off. It is designed to control things like lights, fans, starter solenoids and other accessories that need to be switched on and off.
There are lots of accessories in the car that need to be turned on and off, but also need to have their polarity reversed. Examples include motors for functions like windows, sun roofs and convertible tops and linear actuators. It can also drive things like solenoids for door locks. The ISIS inMOTION Motor Controller Cell gives you full reversing control over 5 accessories, up to 25-amps each. One powerful feature is that since it seamlessly integrates into an existing ISIS System, you can use any switches that you want to the MASTERCELL to control your windows, locks, actuators or any other thing that needs to forward & reverse.
Another powerful feature of inMOTION is that is has current sensing built into it. When you connect an accessory to it, you train the cell to learn its current profile. This allows it to actively shut down an output if the current flowing exceeds the value that it learned. This allows you to do things like express down on windows. When the window hits the bottom of its travel, the motor stalls, the current flow goes up dramatically and inMOTION shuts off the output when it senses this increase in current flow.
In addition to his windows, John Parson used inMOTION to control the doors for the headlamps. He trained the cell to learn the current profile and was able to eliminate any limit switches for the mechanism. The wires for the door mechanism connect directly to the inMOTION Cell and the inputs connect to the headlight switch. He was able to eliminate the need for the DSE controller.
Check out this video of it working.
Jay
Subscribe to:
Posts (Atom)


